I often joke that I have delusions of grandeur, but to be accurate, I have delusions of ability. Pinterest has taken this delusion and turned it into something for which I should probably be medicated. A few months ago I found this beautiful ottoman on Pinterest and decided I would give it a try. When I asked my husband if I had his support he said “Sure, and if it doesn’t work out, there’s always the curb.” The depth of his confidence is a gift. *shakes head*
So here’s how I went about building this beast. First I took the instructions and read them about ten times. Really. I wanted to know exactly what I was doing and what I needed. There’s nothing worse than multiple trips to the same store because you forgot something. I already researched the best dimensions for a coffee table for my couch, so I adjusted all the cut measurements accordingly. I checked and rechecked those measurements because…math.
Then it was off to Home Depot. I have to say that I had the best Home Depot associate I have ever encountered. His name was Leon from the lumber department and not only did he help me get everything I needed for my project, he offered a faster, easier way for me to build the base. Fast and easy is good (and especially good for dirty jokes, but I’m trying to stay focused here), so I was definitely amenable to Leon’s construction ideas.
Fabricland was the next destination. I knew this would be tricky because I needed fabric that was good looking, not too costly, and appropriate for a family with four kids. I thought I would end up buying the foam for the lid here too, but again I got great advice from a sales associate who pointed me to Richard’s Upholstery And Interiors for a higher quality foam that would be the right thickness for my ottoman.
When I got my Home Depot, Fabricland, and Richard’s Upholstery loot home, I built the base. It’s basically a square of 2 x 12’s screwed on to a 3/4″ plywood base.
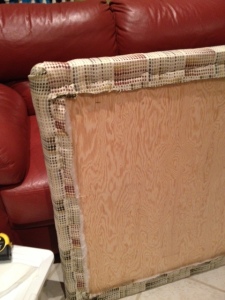
Then I wrapped it in extra thick batting and stapled everything into place.
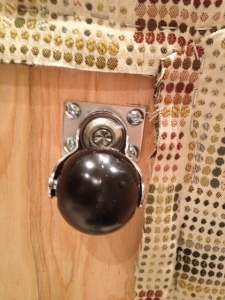
The instructions for the Pinterest ottoman were very light on how to attach the fabric to the base without having staples showing. So again I veered from the original instructions and sewed four pieces of fabric together making a loop of fabric. I pulled the loop over the base making sure the seams were at the corners and stapled everything down. The casters were the last thing added. I positioned them far enough in from the edges so that I would not stub my toes on them and attached them with bolts, washers and lock nuts.
To finish the lid, I lay my batting out, then placed the 3″ medium density foam on top, then placed the plywood for the lid on top of the foam. I wrapped the batting up and stapled it to the plywood. The fabric was next to be stapled on. The print on my fabric really helped me align the fabric properly and keep a consistent tension when I was stapling it in place.
I didn’t like having the cut fabric and batting exposed so I rummaged around in my sewing stuff until I found something that I could use to finish off the lid. I came across some drapery black out material and although this would not typically be used for this purpose, it was on hand and does not fray when cut. Good and good. Fast and easy.
My ottoman is still not totally finished. I want to finish the inside edges of the base the same way I finished the lid. I have an extra piece of plywood that I will get cut down so it can fit inside the ottoman and cover the bolts and I have to decide whether of not to add hinges. The Pinterest ottoman calls for hinges, but I’m not going to lie, it looks hard and I don’t want to mess up what I’ve already done. For now, I’ll enjoy the fruits of my labour as is.


I have math issues. Am I going to be able to do this thing? (If I even try.)
Of course! I’ll come over and we can do it together. Don’t worry, I’ll bring alcohol.
I like this plan.